Russ V
If you are going to do a couple of rosettes only, hot
glue is the way. If you are going to do a lot of the same size you can
build a table for them. I built a second table that I double tape to the
original table. My original table I never use directly. I drilled a
1/4" hole in the center and make a secondary table that I attach with
double sided tape. This hole helps me quickly align my rotary table to the
router and to align the second table to the first table by using a 1/4"
dowel. To make the rosette hold down table I screwed blocks on three sides
of center to hold the rosette centered. The 4th side is on a pivot that
when closed I lock it with the 5th swivel block and a dowel pin to hold it
locked. If you are going to cut on the outside
to make it round then use a small piece of DS tape to hold the piece once you
cut it loose. If they are already cut to size and shape the you only need
to lock it in the table. I used sand paper on the stationary blocks and a
nail cut off on the pivot block to help hold the rosette. I am
thinking that now I am going to make a table with sliding track going out in 4
directions from center so I can then adjust the blocks to fit any size rosette.
I wouldn't particularly want to use the indexing table
to cut blocks round. On small objects I use the band saw and then a jig on
my oscillating sander to smooth the edges and get the final diameter. Much
Much Safer. Use the rotary table to cut the surface only not all the way
thru. Screws, hot glue, DS tape are all good and well, but when I do
rosettes I usually do 100 or 200 at a time. The less screwing the better (
in this case). With my table, I can change out the rosette in seconds . .
. no holes, no hot glue residue to clean up, and no DS tape to peel.
Again, I think I will redo this table with sliding tracks, I then can set
up to do any size rosette ( or box lid). The DS tape to hold the secondary
table isn't holding much (stress wise) since I use a dowel in the center.
The tape only hold the table from spinning. I guess I could screw
the
secondary table down but I like to keep my primary table clean with only
the center hole so it will last. I think I am going to put a Formica
laminate on it to make it more durable and let DS tape stick better.
The center hole technique to center everything is really handy. Once I
center the table, everything can be centered quicker too. For
example, If I am going to center several object of the same size, I make one
with a hole in the center so I can then set it in place with a dowel. Then
I DS tape cleats in place on two sides. Now, every piece I set, whether
with hot glue, DS tape or whatever, the cleats will help me align to center
quicker.
Russv
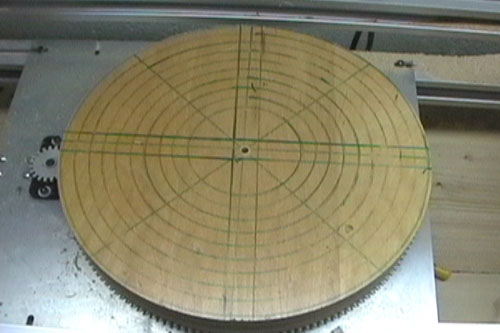
As to centering, if you look at my table pics you will see
there are lines drawn on the table. To create lines is as follows:
After centering the machine, put a bit with a point in the router. Put the
router over center, lock the carriage down on the x axis, and plunge down
to barely touch the table. Start the router and plunge down. Then
slide the router along the y axis in one direction to the outside edge to make a
score line. Come back to center. Do not go the other direction on
the y axis. Turn the handle on the rotary table one full turn and slide
the router along the y axis again and back to center. Do this 8 times and
you
should see 4 long lines on your table at 45 degrees apart. The reason you
don't go both directions off the y axis is so that now when you look at the
lines, they should look straight all along the line even though you drew it by
two operations. If the lines don't look straight, then you weren't
centered.
If everything looks straight, then you are good to go. Make sure you
always line the router to this center point and you will be good to go. To align
a block of wood is simple now. If the block of wood has 90 degree corners
then when you line up all 4 corners on the lines on your table you are centered.
This still works on an octagon shape also. make sure you use a pen in your
score lines to make them easier to see.
Curt George
John Doe

Here is what I did. I took a 14" square piece of drafting
table top, found center. Used a bowl cutting
template to draw 1" incremental circles. Then I routed a groove and
inserted T track to intersect in center using hold downs to hold sides of
material. Here's my problem, I am using a plunge cutting round over bit to round
over the outside edges and regardless of how tight I tighten it down it still
vibrates loose. I don't think I'm taking too big a bite each pass. What are some
good projects for the rotary table?
To keep things in place use a piece of sticky
back sand paper about 100 grit or so. Or even some stair step non-skid
tape. It will cure your slip problem. The drafting table top is just
too slick.
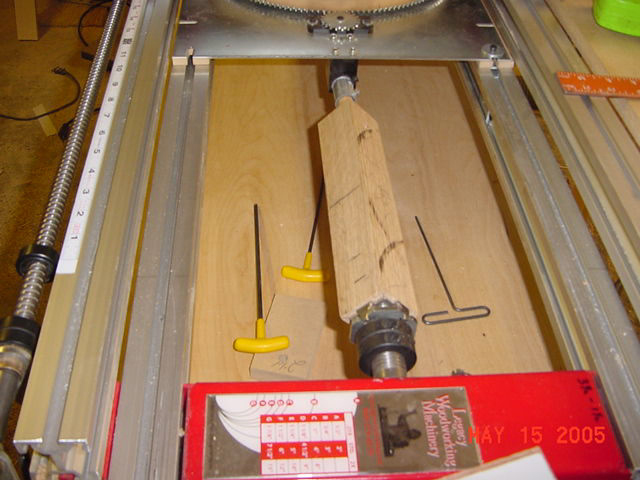
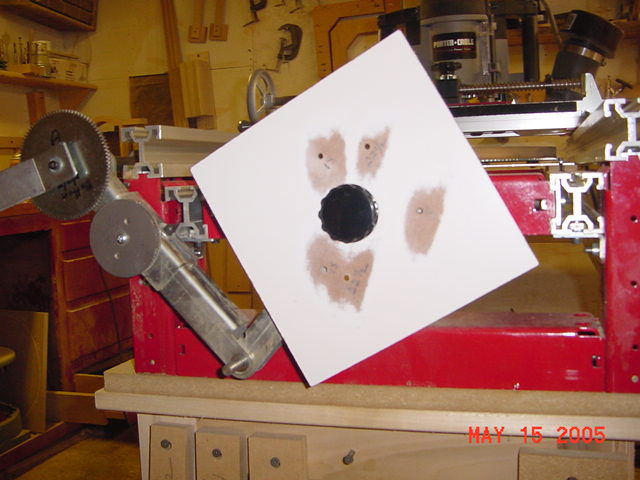
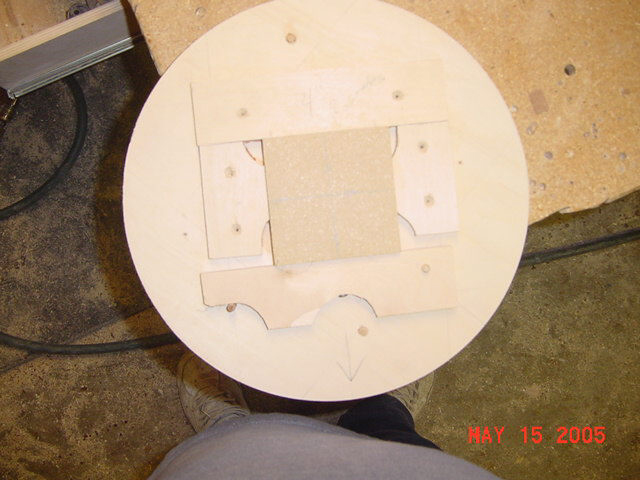
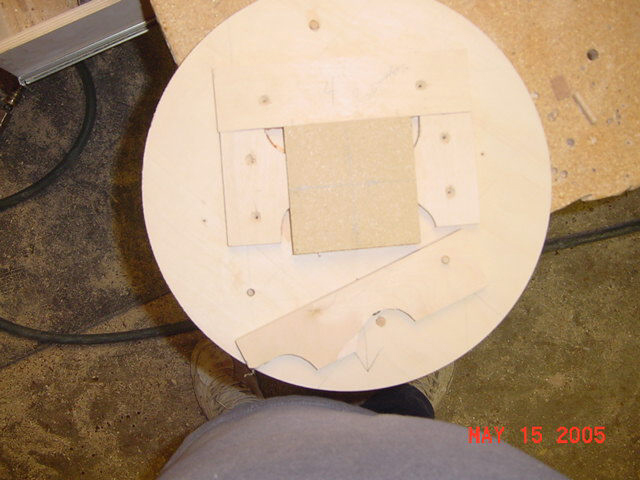
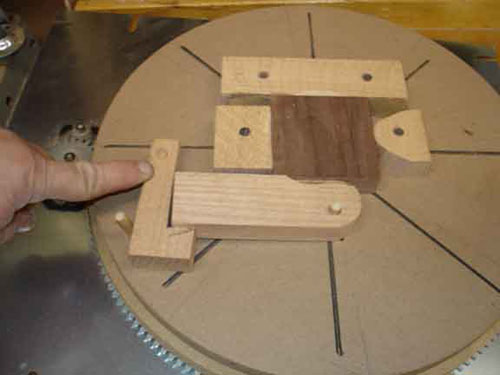
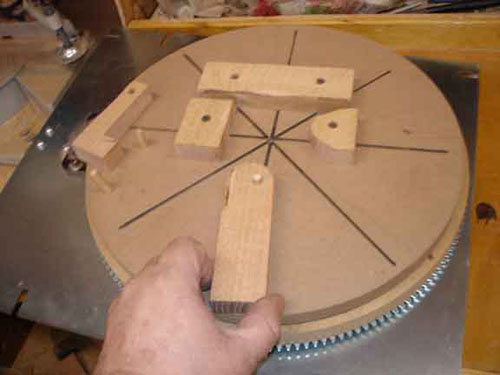
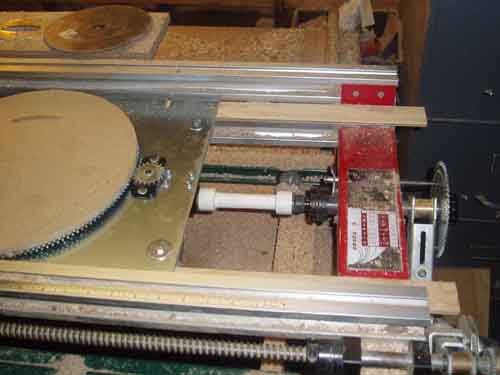
First I am from Bloomington Il. I have been learning from everybody on this forum. The first picture is the way I hooked up the table to my head stock. I use different tables for each thing I do on the table. I just use 1/4" pins to line everything up. The second picture shows that I am making new indexing plates. This one is for 15 degree and 22 1/2 degree spacing. They are made out of 1/8" hard board. The next two pictures are of the way I hold down my rosettes. In the bottom there is a screw through the plywood with just a small tip through to pin the rosette when I lock the arm in. I would like say that I really enjoy this forum and wish that we could all meet sometime. I have been woodworking for about 20 years as a second income. I work for (now don't laugh) The Town Of Normal, Illinois. My hours are am-12pm Tuesday thru Friday so this gives me time to do my woodworking. For the last 6 years I have been doing a lot of kitchens and am tired of doing them. So with my Legacy I am trying something different. OK enough rambling time to relax.

